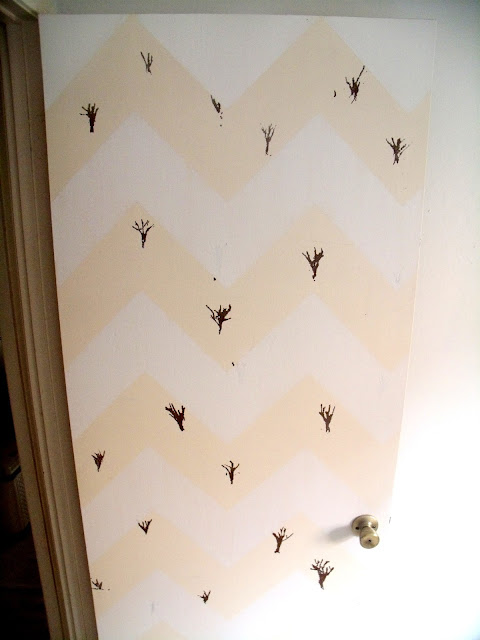
CHEVRON DOOR + LITTLE TREES
TUESDAY, MARCH 19, 2013
Well.....a good part of me is nervous.
Nervous about not completing my daughter's room in time,
preferably before Easter,
that my ideas won't mesh well with each other,
that my daughter won't approve, like love, her room,
that it won't be "hello kitty" enough
that it won't be "hello kitty" enough
and
that mom would have messed up hugely hahaha
PRESSURE? oh no, not here.
I've got all kinds of things started,
not many fully complete.
I say, "while this is drying, on hold, etc I'll start this"
So here's that very thing in action,
while waiting for 2 of the walls to dry
(working on the other 2 today)
I looked at the bedroom door and started thinking,
"what am I to do with these chipped off areas?"
I already bought 1 can of paint,
I don't want to use the same color again,
and I don't want to spend more money.
WHAT TO DO?
WHAT TO DO?
WHAT TO DO?
WHAT TO DO?
Eh, make the chips into trees!
I used what was next to me,
the light switch plate hahaha
the light switch plate hahaha
I used the corner of the plate and scraped.
I did the best to sort of have them spaced evenly.
But that wasn't enough.
I had the chevron print in mind for something else in her room
which will still happen, but got the idea again & wanted it now.
This is where I got my help with the CHEVRON although there's other ways,
maybe even easier.
This seemed to click in my brain.
As per site, divide your length into equal measurements
along with your width.
When it all came down to it, I just went with 7x7 squares
in honor of my baby girl's 7th birthday .
Ok, for me this wasn't as easy.
It was just me, my 12in ruler, pencil and clumsy hands
BUT even so, it came out great!
After each row/column is LIGHTLY drawn,
you have the option of making
1 diagonal line per square,
starting at the left bottom corner up to the top right(repeat)
or
2 diagonal lines per square,
starting at the left bottom corner up to the top center
then down to the right bottom.
I chose the 1st option.
NOW tape, tape, tape!
Since I didn't paint the door a new color,
I taped on the inside of the areas I would keep in cream,
adding all my scrap pieces there too, to remind me NOT to paint there.
The areas that were exposed aka without the scraps
is where I was to paint AFTER cleaning off pencil.
* REMOVE with gum eraser, baking soda+water or
plain old non-gel toothpaste.
I used a brush with downward strokes.
When slightly dry, peel off the tape.
I waited a tad too long and had a few slivers of tape to peel off.
FYI this is when you also remove eraser from the taped off areas.
once again
I looooove it!!!!
////////////////////


Comments
Post a Comment