DIY RUSTIC PUMPKINS
SUNDAY, SEPTEMBER 2, 2018
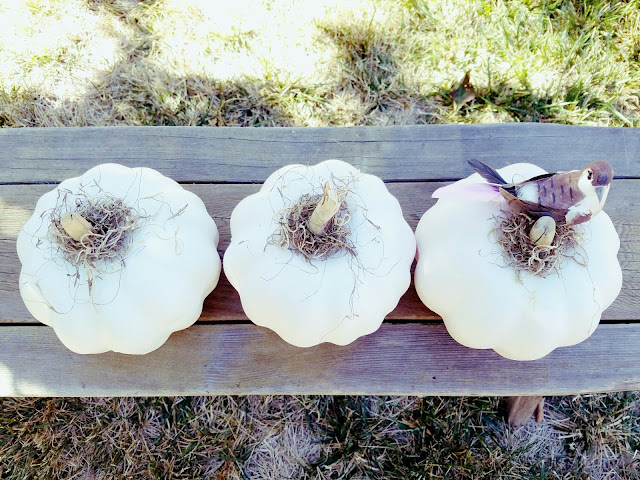
Aren't these some cute little pumpkins?!
Or in my case, garlic?
At the time that I had these cute little pumpkins on my console
(a few years back),
my mom said she saw nothing but garlic
(with a slight grimace)
and that I should paint them orange.
I told her, "but I just painted them IVORY
so they WOULDN'T be orange!" lol
Oh mom...
Maybe I should have called this post:
DIY GARLIC!
Get your "garlicky" details below :)
I had previously shown you these pumpkins here
and here 4+ years ago,
as part of the fall decor for baby M's baby shower.
Which of course means....
he's already 4!
Although I intended to share this back in the fall of....
I can't even tell you honestly.
I got sidetracked with baby, kiddos and life in general.
That seems to be my M.O. around here unfortunately.
What can I say, life gets too good to stop,
sometimes just messy,
others crazy busy.
I'm a human with many faults,
one being my timing.
Well, fall is just around the corner right?!
Since you've seen what I do with late,
I'll just share this "early" and get it out there.
HA!
Besides,
I don't see why you couldn't keep them throughout the year
if you have a rustic theme in your home.
You decide.
I had shared briefly how I made them back in 2013
but I thought I'd give you guys a visual,
because you know, it's necessary for the people with eyes.
lol
This time I made one using a different paint
and hopefully will last as well as my others have.

When I was all done, I hot glued some dry moss(Dollar Tree)
and poked some driftwood through it but any interesting branch would do.
This time I made one using a different paint
and hopefully will last as well as my others have.
 |
| Pumpkin: Dollar Tree Paint: Old, Ace Navajo White Paper: Old packing paper from shipments |
I initially used Styrofoam safe paint which I had purchased with a Micheal's coupon.
This 2nd time around, I used what I had on hand because it was cheaper
and allowed me to test the regular paint.
Although I was taking a chance on the pumpkin getting damaged,
for a buck I didn't mind experimenting.
 |
| updated paint can |
I flipped pumpkin upside down and sprayed evenly.
I kept the paint can about 12in away as well so it would not eat through the Styrofoam.
Coverage was good but not great.
After that dried and I was satisfied with the coverage,
I flipped it over and removed the stem.
I then sprayed the top a few times.

When I was all done, I hot glued some dry moss(Dollar Tree)
and poked some driftwood through it but any interesting branch would do.
That's it!
So what's the verdict,
Styrofoam paint or regular spray paint?
Go ahead and splurge on the Styrofoam paint, better yet, use a coupon!
It was thicker and had better coverage.
BUT if you don't have a coupon or already have regular paint
it works too, it just requires a bit more.
Let me know what you think.
While you're add it, is my mom right,
is this garlic?!
hahaha


Comments
Post a Comment